Ardell Magnetic Lashes

I’ve been an Ardell lash user since my dance competition days in middle school. Since then I think I’ve used every shape and style of their lashes that I could get my hands on. They make a quality product that I return to the store to purchase time and time again.

So of course I was SUPER excited when I heard that Ardell was coming out with new magnetic strip lashes. The glamour without the glue? I’m in! ๐Ÿ™‚

I pretty much stalked my local Sally’s Beauty Supply and Ulta for a couple weeks. Finally I got my hand on a few pairs.

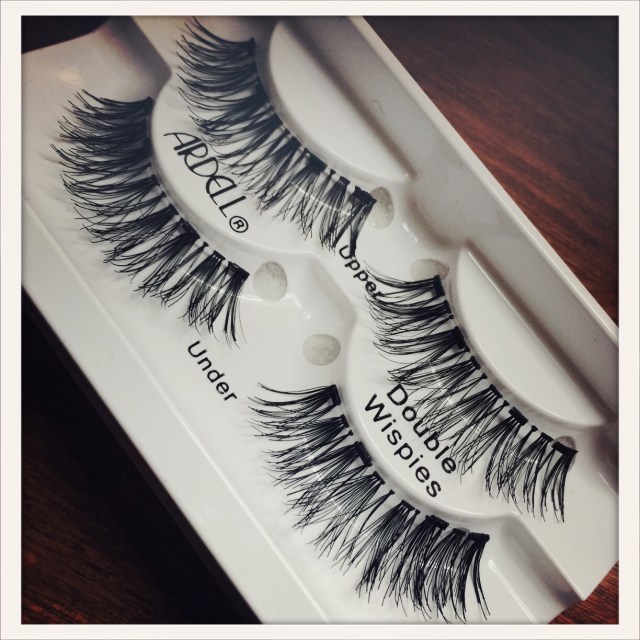
Upon opening the package, one of the first things I noticed was how lightweight they were, which is a great thing because you’ve now got double the lashes.

Okay so I didn’t quite get how to put them on initially. The video clips make it look super easy. I can tell you it does take some practice, but once you’ve got it down, I think you will like these as much as I do. One piece of advise I can give is to check out Ardell’s IG @ardellbeauty. There you can see videos with some troubleshooting tips such as cutting the lashes into smaller magnetic pieces to make application easier.

So now that you are motivated to give these a try, here’s the where and the how much.

Available at the following stores:

  • Ulta
  • Sally’s Beauty
  • Target
  • CVS
  • Rite-Aid
  • Walmart
  • Walgreens

Available in three styles:

  • Double Wispies
  • Accent Lashes
  • Double 110

Cost: $12-$14 depending on where you purchase.

Here you can see a before and after. The top is without the magnetic lashes, and bottom is with the magnetic double wispies.

Thanks for reading!

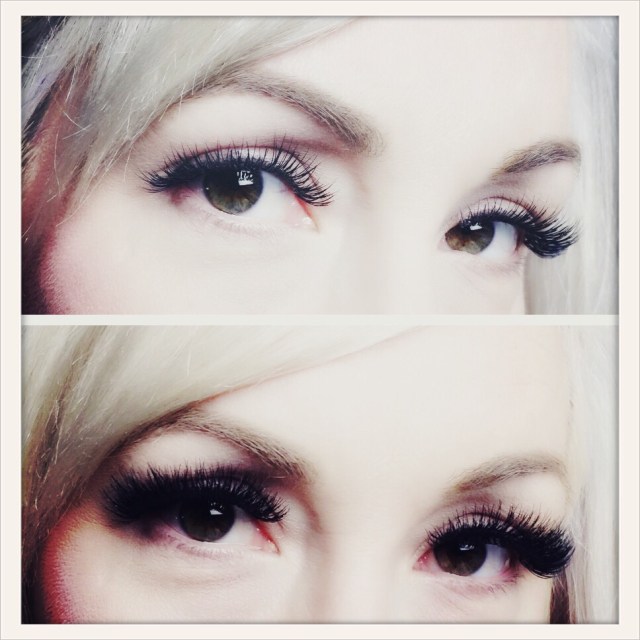
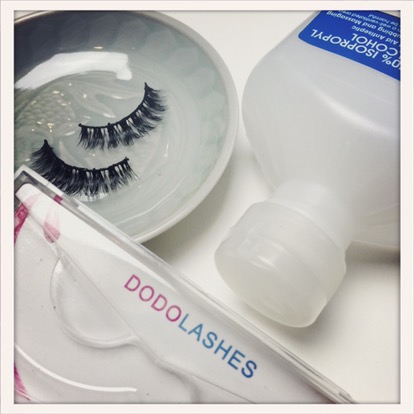
Photo Information: Top – Ardell Lashes in Double Wispies and Double 110 styles, Middle – Close-up of Double Wispies, and Bottom – Before and After using Double Wispies.

Holiday – Makeup of the Day

For all of you who are feeling the holiday vibes, here’s a little makeup inspiration in the event you are wanting to be a bit extra for your holiday festivities. All products are listed on my IG @allthingsadoredofficial

Happy holidays everyone!! ๐ŸŽ„๐Ÿค—

Pros and Cons of Eyelash Extensions

Pros:

  • Cuts way down on getting ready time.
  • Pretty much always look wide awake and refreshed.
  • No pesky eyelash glue mishaps (I have them quite often).

Neutral:

  • Washing your face much differently.
  • Sleeping more carefully, so not to squish your new lashes into the pillow.

Cons:

  • Unable to use liquid eyeliner.
  • Slightly pricier than faux lashes (but not much – range from $25-$60 for approx. 2-3 weeks).
  • Commitment to same eyelash design for a two week period (for those of you who like to change it up).

Overall, I would highly recommend trying them out for yourselves. I will definitely be getting them again.

Thanks for reading! ๐Ÿ™‚

DIY Firework Lashes

Materials:

  • Artificial lashes of your choice (I used Dodo Lashes, style D115).
  • Cosmetic grade glitter.
  • Glitter adhesive (I used Sprinkles Glue from Beauty Bakerie).

Process:

  • While leaving your lashes in their tray, brush a third (or however much you are wanting for your first glitter) with glitter adhesive.
  • Repeat the process with the rest of the lash.
  • After the tops have dried fully, gently remove them from their tray, and repeat the process with the bottom side of the lashes.
  • Once both sides have dried, you are ready to apply.

To see the final result, check out my Instagram @allthingsadoredofficial

Thanks for reading and have a great 4th of July! ๐Ÿค—

And The Winner Is….


Congratulations to Karalee!!! You are the winner of my One Year Blogiversary Giveaway!!! 

I was so happy with the positivity and support from everyone, that I selected two runners up for a special little something as well….

Crazyrilee and Laurynwadden you will also be receiving a little something!

All winners mentioned above, please email me at AllThingsAdoredOfficial@gmail.com with your contact information so I can get your goodies out to you!!! 

Have a happy and safe New Years everyone! ๐Ÿ™‚

One Year Blogiversary and Holiday Giveaway!

So wow! A full year of blogging madness began one whole year ago this very day. In celebration of my blogiversary, I am doing a celebratory giveaway. Yay for me and yay for you!!! ๐Ÿ™‚

The giveaway includes (exactly as pictured above):

  • A Love & Beauty face mask from Forever 21
  • A NYX Intense Butter Gloss
  • A package of Ardell lashes
  • Burt’s Bees Mango Lip Balm
  • Agave Healing Oil – oil treatment
  • Hask Kalahari Oil shampoo and conditioner

How to enter:

  • Follow my blog.
  • Like this post.
  • Comment below on what your favorite post of the year was.

Winners will be selected at random on December 30th. Open to U.S. and International followers.

Good luck and thank you for all your support over the last year.

    DIY False Eyelash Cleaning


    The bane of my existence… cleaning my eyelashes! But I have discovered a new method that makes this whole process less tedious.

    What you’ll need:

    • Your used false lashes 
    • Rubbing alcohol (I use 70%)
    • A small dish or bowl 
    • Original eyelash tray that your lashes came in

    The process:

    • First place your lashes into a small bowl/dish.
    • Next, pour rubbing alcohol into the bowl/dish until your lashes are completely submerged.
    • Leave them soaking for a few moments.
    • Next, gently remove mascara and glue with your fingers.
    • Once clean, place the eyelashes back in their original tray to maintain their shape.
    • That’s it!

    Happy cleaning!! ๐Ÿ™‚

      100 Followers Contest Winner


      And the winner is (drumroll please)…. With All My Affection!!! Congratulations!!! Yay!!!

      When you have a free moment, email me your mailing info. and I will get your beauty package out to you.

      Congratulations once again, and thank you to everyone who entered and continues to support my blog. 

      The next giveaway will be at 500 followers, so please continue to spread the word ๐Ÿ™‚